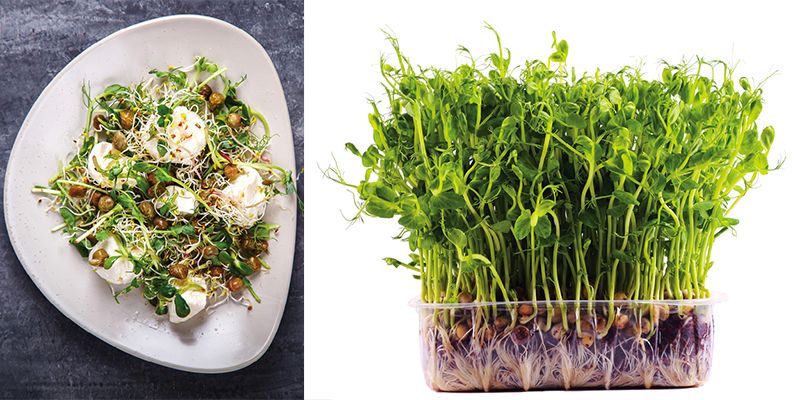
Flavor your cuisine from a homegrown micro garden

(Above) Add microgreens—like the pea sprouts growing at right—to salads, soups, sandwiches, and more.
Chefs sprinkle microgreens atop restaurant dishes because they pack a strong flavor punch. Plus, these immature herbs, vegetables, grains, and even edible flowers are super-healthy: a study by the USDA’s Agricultural Research Service found that almost all contain some five times more nutrients than mature leaves of the same plants.
Harness micro-power at home with a kitchen garden tiny enough to tuck onto a window sill. Broccoli, cabbage, mustard, chia, sunflower, and buckwheat are great choices for beginners. So too are combos made by seed companies, like Botanical Interests’ ‘Italian Amaro Blend’ or ‘Savory Mix’. The rewards come quickly, with a seed-to-harvest time of two to four weeks, depending on variety. While the selection is broad, the basic instructions are the same:
1. Choose a shallow container at least 2½ inches deep with drainage holes (try adding holes to a pie pan or take-out food container). Wash it with a solution of one part bleach to nine parts water.
2. Fill the container with two inches of damp seed-starting soil, leaving a 1/2 inch of space at the top to prevent water runoff. (It’s vital to use seed soil, which is lightweight, well-draining, and—most importantly—sterile).
3. Follow the sowing directions on the seed packet.
4. Place in a sunny window (or under a fluorescent light) where temperatures are around 70 degrees.
5. Mist seeds daily to keep them moist, encouraging germination.
6. When the cotyledons are about 2 to 2½ inches tall, harvest by cutting at the soil line. You can also wait until the first set of true leaves appears.
7. Resow every 14 days, as microgreens will not regrow. Once you get the hang of it, try creating your own custom blend of favorite varieties.