Plus, pro tips for adding embellishments and more
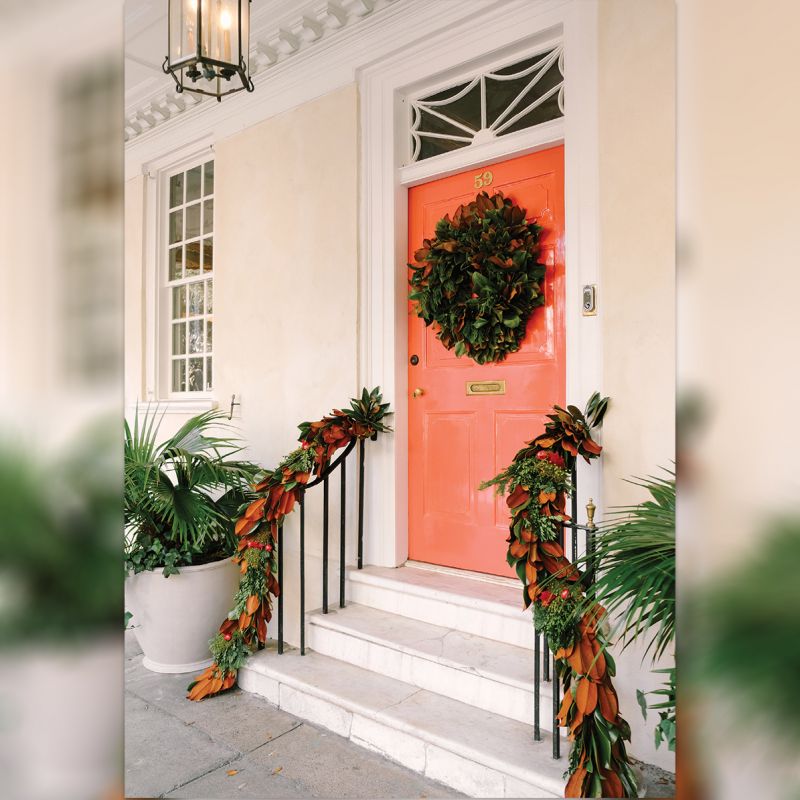
(Above) Watch Flora's Christine Elliott demonstrate her process for crafting a magnolia garland in a how-to video. (Top) Magnolia leaves mingle with other greens and pomegranates in these festive front-door decorations.
The Lowcountry’s best-known evergreen boughs just might be those of the magnolia, and luckily, they couldn’t be more perfect for decking the halls. Glossy green on top and velvety brown on bottom, the leaves are large enough to quickly fill out garlands that can last a month indoors or out. And with a tree on virtually every corner, most everyone can harvest their own materials.
“With a little finesse, magnolia garlands are easy to make,” promises Christine Elliott, the founder of Flora, a local floral design firm named for her daughter and creative partner, Flora Penrose. “The foliage looks gorgeous on its own but also contrasts beautifully with other elements if you choose to add them.”
Use a judicious eye when collecting your greens, as scale and algal leaf spot can be problems. “Branches higher off the ground may be healthier and more attractive,” says Elliott. (If you’d rather buy the foliage, try Horst Wholesale Florist, which charges about $13 per grower’s bunch—enough to make three to five feet of garland).
From there, follow Elliott and Penrose’s step-by-step instructions. crafting your own garland to serve as doorway, mantel, or even dining table decor.
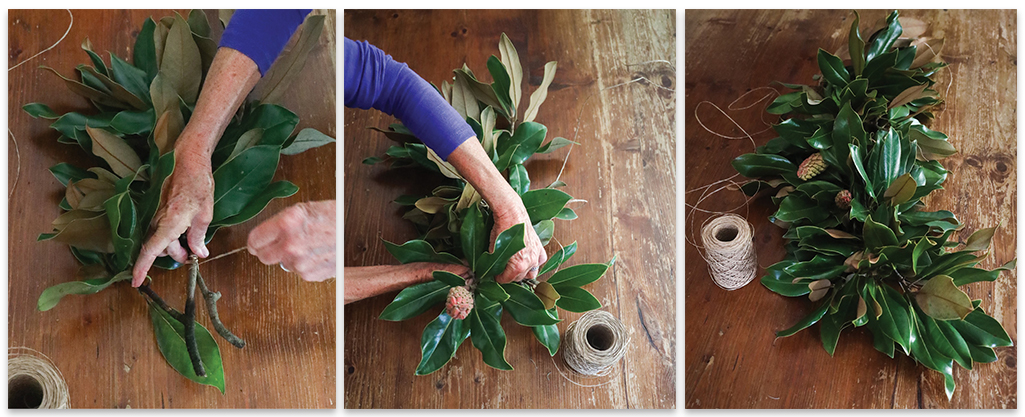
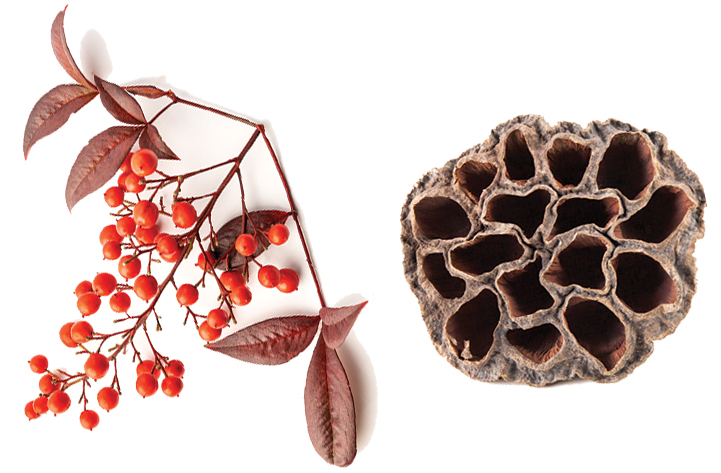
(Left to right) Christine Elliott begins her garland, attaching one magnolia branch to another with Oasis Bind Wire. She adds a third branch (accented by a seed pod) facing the opposite way. “Play with the branches, fitting them together like puzzle pieces to create a full look,” advises Elliott.
Materials:
■ String for measuring, optional
■ Magnolia branches
■ 22- to 26-gauge florist wire
■ Pruning shears
1. Determine the garland’s length. It works well to drape a string across the space you plan to decorate, then cut it to your desired size. Lay the string across your work surface to serve as a visual guide.
2. If you harvested the branches yourself, wipe leaves with a damp cloth to remove any debris. Clip out damaged leaves as needed.
3. Cut branches into 12-inch lengths. Place the ends in buckets of fresh water and allow them to “condition” for at least several hours; 12 to 24 hours is ideal.
4. When ready to make the garland, select two of the most attractive branches to serve as end pieces. Set one aside. Position the other on your work surface with its leaves pointing out.
5. Keeping the florist wire attached to the spool, wrap one end securely around the lower part of the branch. Continue working with this single piece of wire; you shouldn’t have to cut it until you reach the end of the garland.
6. Layer a second branch over the bottom of the first. Leaves may face in the same direction or the opposite—experiment to decide what looks best here and as you add subsequent branches. Wrap wire around both branches to secure them together.
7. Continue wiring on branches until you’re within 12 inches of your desired length.
8. Add your reserved end piece with its leaves facing out.
9. Cut the wire and twist its ends together; wrap it tightly around the branch.
10. Review the finished garland and touch up as needed, wiring additional branches or leaves into any areas that look sparse.
Tips:
December 2021 Events:
Holiday Greens Sale {December 4}
It’s time to deck the halls! Shop for wreaths and garlands made of Fraser fir, boxwood, magnolia leaves, and mixed greens at this Charleston Horticultural Society sale. South Windermere Shopping Center, 80 Folly Rd. Times & prices vary. CHASHORTSOC.ORG
Holiday Wreath Making Workshop {December 4}
Use traditional greenery to craft your own festive wreath under the guidance of Christine Elliott, Flora Penrose, and fellow members of The Garden Club of Charleston. The 99-year-old club decorates the Joseph Manigault House for Christmas each season, and admission to the historic home is included with your ticket to this Charleston Museum event. Registration is required. The Charleston Museum, 360 Meeting St. Saturday, 1-3 p.m. $105; $75 Charleston Museum member. charlestonmuseum.org